Hello,
I don’t think that i’m the only one who has enough reasons to write all this post and to talk about all these steps and tools. We have all heard about SharePoint 2013. As a SharePoint Developer I was wondering how to start, or how to get a development and testing environment, so if you are looking for the same thing and you couldn’t get or download a virtual machine with SharePoint 2013 installed or if your hardware does not meet the minimum requirements necessary to run it or even if you don’t have all the required licenses… whatever was the reason, don’t give up because there’s always a solution.
All what you have to do is (1) to sign up for an Office 365 Developer Site and you will get a SharePoint Site already preconfigured for what we call “apps”. (the new way of packaging SharePoint 2013 Solutions).
Once we have our developer site provisioned, the next step is to (2) install and deploy what we call “Napa” Office 365 Development Tools. Using this browser-based authoring tool, we will be able to start building SharePoint-hosted apps without having to install anything on our machine.
Assuming that you still want to leverage the full power of the Microsoft Office Developer Tools for Visual Studio 2012 or to take advantage of the other web development features, we will see how to (3) download and import the project that we have started with Napa into Visual Studio 2012. (i will show you what to install exactly on your machine to get the Microsoft Office Developper Tools integrated into your VS)
So to sign up for an Office 365 Developer Site, you can either start with a free 30-day trial or to buy an Office 365 Developer Subscription.
I have chosen the first option so once the page is loaded we will get the next screen. (The page detects the default language of your browser and in my case i have selected the English option)
Here we need to fill the fields with the required information to setup the account and to get our user ID with which we will sign in to the Office 365 portal site later.
You will be then redirected to the Office 365 admin center. Just wait until the site gets provisioned.
Take your time to explore all the admin center areas.
We got only one user license, we will find the admin account under « active users » when we click « Users and Groups » menu.
Check the « Domains » link, here’s the domain name of our developer site.
Click the « Sites » link to access your provisioned sites
Here we have two provisioned sites. The first one is a simple team site, and the second one is a public site (we can choose to make it online/offline with only one click. Once it is made online, anyone on the internet will be able to access it without having to be logged on).
Click the “Team Site” link to access the first site. I called it “SP With Love” I think because I still love SharePoint. (Trust me it’s not only about having a job, a career …having a blog or whatever you want but you should love what you are doing, that’s the secret ;))
Anyway, the next screen shows the home page of our team site. (Notice the usual menus already used in SharePoint 2010)
The next step is to deploy and install the “Napa” Office 365 Development Tools as I said at the beginning, so click the “Build an app” link to access the SharePoint Store.
As the message is telling us, it couldn’t determine which set of apps to show in the page because there’s no selected language by default. We can select the English option and we will be redirected to the famous “Napa” Office 365 Development Tools app page as shown in the next screens.
Here we are ! So click the “ADD IT” button to deploy and install this app to your developer site. You will need to sign in with a Microsoft account, not the one that we have created at the beginning to access the portal site.
Once done, you will have to confirm your choice.
The app is now deployed to the site.
We will try to create and build our first app using this tool so go to the “Site Contents” page. Here we will find the lists, libraries and apps that exist in the site. We will launch this app so click the “Napa” Office 365 Development tools link.
As shown below, using this tool we can create and build apps for SharePoint and for Office (Content app for Excel template, Content app for Excel and Mail app for Office). We will choose the first project template and click the “Create” button.
The tool generates the default files and content associated with the “app for SharePoint” project template. Check the structure of the project, the content of each element and the available buttons that appear in the left menu.
As shown in the “App.js” file, the app is trying to get the logged on user and to display its name (or title) in the page, and exactly in the “<p>” tag with id = “message”.
We still are talking about first steps with SharePoint 2013 and our developer site so to keep things simple we will just deploy it and see what it gives.
I will just rename the app and call it “First SharePoint App Demo”.
Once the title is modified click the “Run project” button to package and deploy the app.
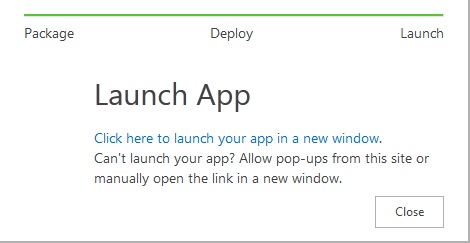
Now click the link to launch it.
And this is our first app for SharePoint. The page, once loaded, is displaying the Hello message.
Let’s see something else. Check the other buttons available in the right menu of the development tool. We will open our project in visual studio, assuming that we need to add something and we want to do that with VS, not with the Napa tool, so click the button “Open in Visual Studio”. The project will be packaged and exported into a .exe file. Once downloaded, we will launch it. It will automatically check whether VS is installed or not, if it’s the 2012 version and whether the Office developer tools are installed or not. If all is installed it will load and open the project as shown below.
(You will be prompted to sign in to the developer site so VS can deploy the solution later, once modified)
Our first SharePoint app is simply displaying the logged on user name. Let’s add some animation using the JQuery Library and make the result look better. We will edit our solution so click the “App.js” file to open it and add the required code to animate the <div> tag showing the Hello message as shown in the next screen.
Once done right click the SharePoint project and select “Deploy” to deploy it.
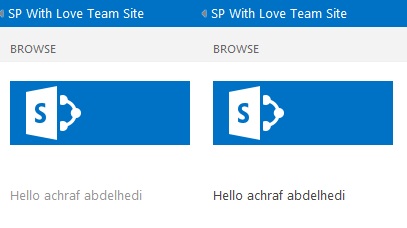
Check the “First SharePoint App Demo” app on the developer site. Now we are getting some nice animation after the message is displayed the first time.
Until now we have seen how to provision our Office 365 Developer site, how to install the “Napa” developer tools, how to create our first app for SharePoint using this tool and how to edit and deploy it using Visual Studio. That’s what I call “first steps with SharePoint 2013 and Office 365” but there is more. What about SharePoint Designer ? lol so I can’t show you how to open the developer site with it I think that we can all do that. I just wanted to talk about SP Designer so you can explore the site and its content using this tool and check all the new functionalities that are available now within the new version.
That’s it ! I hope that was helpful !
We have seen until now how to get a development and testing environment, what are the development tools available now with Office 365 and SharePoint 2013, we have created our first SharePoint app and we can see things clearly with SharePoint Designer and all its fonctionalities. Now we have all what we need to start and to get more familiarized with SharePoint 2013 the online version and Office 365.


